Serverless
Introduced in GitLab 11.5.
CAUTION: Caution: Serverless is currently in alpha.
Run serverless workloads on Kubernetes using Knative.
Overview
Knative extends Kubernetes to provide a set of middleware components that are useful to build modern, source-centric, container-based applications. Knative brings some significant benefits out of the box through its main components:
- Build: Source-to-container build orchestration.
- Eventing: Management and delivery of events.
- Serving: Request-driven compute that can scale to zero.
For more information on Knative, visit the Knative docs repo.
With GitLab serverless, you can deploy both functions-as-a-service (FaaS) and serverless applications.
Prerequisites
To run Knative on Gitlab, you will need:
-
Existing GitLab project: You will need a GitLab project to associate all resources. The simplest way to get started:
- If you are planning on deploying functions, clone the functions example project to get started.
- If you are planning on deploying a serverless application, clone the sample Knative Ruby App to get started.
-
Kubernetes Cluster: An RBAC-enabled Kubernetes cluster is required to deploy Knative. The simplest way to get started is to add a cluster using GitLab's GKE integration. The set of minimum recommended cluster specifications to run Knative is 3 nodes, 6 vCPUs, and 22.50 GB memory.
-
Helm Tiller: Helm is a package manager for Kubernetes and is required to install Knative.
-
GitLab Runner: A runner is required to run the CI jobs that will deploy serverless applications or functions onto your cluster. You can install the GitLab Runner onto the existing Kubernetes cluster. See Installing Applications for more information.
-
Domain Name: Knative will provide its own load balancer using Istio. It will provide an external IP address or hostname for all the applications served by Knative. You will be prompted to enter a wildcard domain where your applications will be served. Configure your DNS server to use the external IP address or hostname for that domain.
-
.gitlab-ci.yml: GitLab uses Kaniko to build the application and the TriggerMesh CLI to simplify the deployment of knative services and functions. -
serverless.yml(for functions only): When using serverless to deploy functions, theserverless.ymlfile will contain the information for all the functions being hosted in the repository as well as a reference to the runtime being used. -
Dockerfile(for applications only: Knative requires aDockerfilein order to build your application. It should be included at the root of your project's repo and expose port8080. -
Prometheus (optional): Installing Prometheus allows you to monitor the scale and traffic of your serverless function/application. See Installing Applications for more information.
Installing Knative via GitLab's Kubernetes integration
NOTE: Note: The minimum recommended cluster size to run Knative is 3-nodes, 6 vCPUs, and 22.50 GB memory. RBAC must be enabled.
-
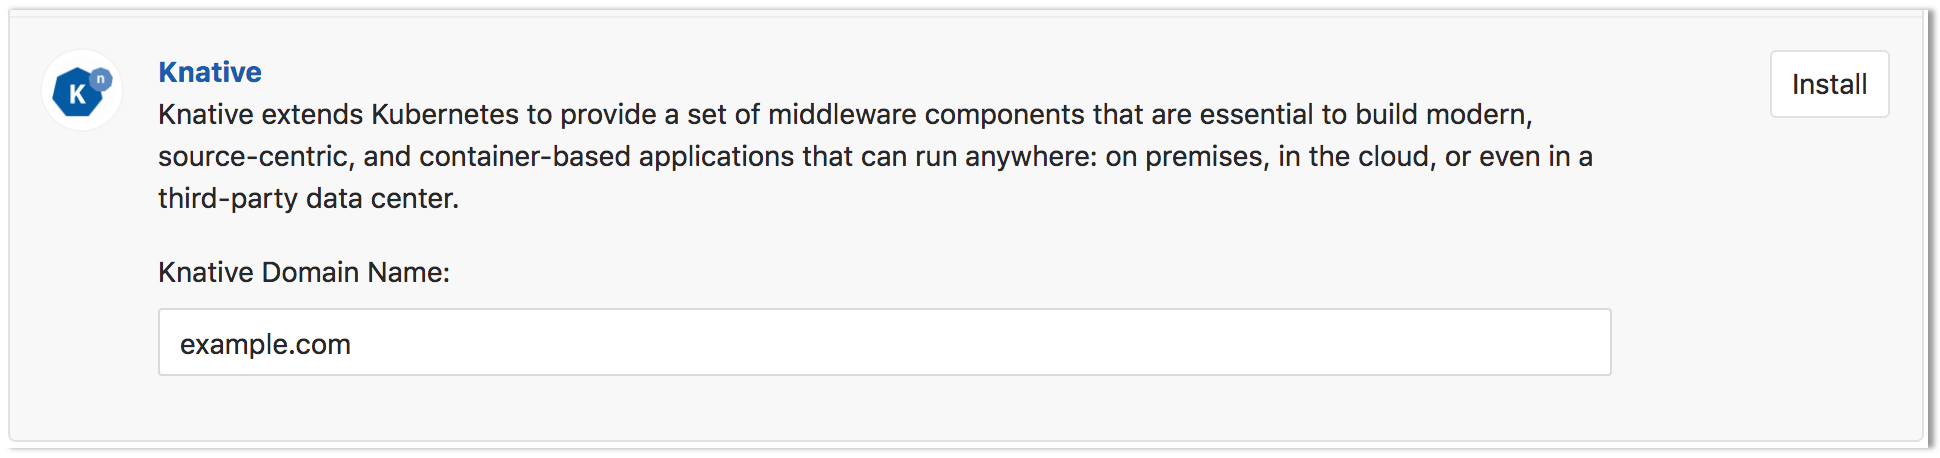
Once Helm has been successfully installed, scroll down to the Knative app section. Enter the domain to be used with your application/functions (e.g.
example.com) and click Install.
-
After the Knative installation has finished, you can wait for the IP address or hostname to be displayed in the Knative Endpoint field or retrieve the Istio Ingress Endpoint manually.
NOTE: Note: Running
kubectlcommands on your cluster requires setting up access to the cluster first. For clusters created on GKE, see GKE Cluster Access, for other platforms Install kubectl. -
The ingress is now available at this address and will route incoming requests to the proper service based on the DNS name in the request. To support this, a wildcard DNS A record should be created for the desired domain name. For example, if your Knative base domain is
knative.infothen you need to create an A record or CNAME record with domain*.knative.infopointing the ip address or hostname of the ingress.

NOTE: Note:
You can deploy either functions or serverless applications
on a given project but not both. The current implementation makes use of a serverless.yml file to signal a FaaS project.
Deploying functions
Introduced in GitLab 11.6.
Using functions is useful for dealing with independent events without needing to maintain a complex unified infrastructure. This allows you to focus on a single task that can be executed/scaled automatically and independently.
Currently the following runtimes are offered:
- node.js
- kaniko
You can find and import all the files referenced in this doc in the functions example project.
Follow these steps to deploy a function using the Node.js runtime to your Knative instance (you can skip these steps if you've cloned the example project):
-
Create a directory that will house the function. In this example we will create a directory called
echoat the root of the project. -
Create the file that will contain the function code. In this example, our file is called
echo.jsand is located inside theechodirectory. If your project is:- Public, continue to the next step.
- Private, you will need to create a GitLab deploy token with
gitlab-deploy-tokenas the name and theread_registryscope.
-
.gitlab-ci.yml: this defines a pipeline used to deploy your functions. It must be included at the root of your repository:include: template: Serverless.gitlab-ci.yml functions: extends: .serverless:deploy:functions environment: productionThis
.gitlab-ci.ymlcreates afunctionsjob that invokes some predefined commands to deploy your functions to your cluster.Serverless.gitlab-ci.ymlis a template that allows customization. You can either import it withincludeparameter and useextendsto customize your jobs, or you can inline the entire template by choosing it from Apply a template dropdown when editing the.gitlab-ci.ymlfile through the user interface. -
serverless.yml: this file contains the metadata for your functions, such as name, runtime, and environment.It must be included at the root of your repository. The following is a sample
echofunction which shows the required structure for the file.You can find the relevant files for this project in the functions example project.
service: my-functions
description: "Deploying functions from GitLab using Knative"

provider:
  name: triggermesh
  registry-secret: gitlab-registry
  environment:
    FOO: BAR

functions:
  echo:
    handler: echo
    runtime: https://gitlab.com/triggermesh/runtimes/raw/master/nodejs.yaml
    description: "echo function using node.js runtime"
    buildargs:
     - DIRECTORY=echo
    environment:
     FUNCTION: echo
The serverless.yml file references both an echo directory (under buildargs) and an echo file (under handler),
which is a reference to echo.js in the repository. Additionally, it
contains three sections with distinct parameters:
service
| Parameter | Description |
|---|---|
service |
Name for the Knative service which will serve the function. |
description |
A short description of the service. |
provider
| Parameter | Description |
|---|---|
name |
Indicates which provider is used to execute the serverless.yml file. In this case, the TriggerMesh tm CLI. |
registry-secret |
Indicates which registry will be used to store docker images. The sample function is using the GitLab Registry (gitlab-registry). A different registry host may be specified using registry key in the provider object. If changing the default, update the permission and the secret value on the gitlab-ci.yml file |
environment |
Includes the environment variables to be passed as part of function execution for all functions in the file, where FOO is the variable name and BAR are he variable contents. You may replace this with you own variables. |
functions
In the serverless.yml example above, the function name is echo and the subsequent lines contain the function attributes.
| Parameter | Description |
|---|---|
handler |
The function's file name. In the example above, both the function name and the handler are the same. |
runtime |
The runtime to be used to execute the function. |
description |
A short description of the function. |
buildargs |
Pointer to the function file in the repo. In the sample the function is located in the echo directory. |
environment |
Sets an environment variable for the specific function only. |
After the gitlab-ci.yml template has been added and the serverless.yml file has been
created, pushing a commit to your project will result in a
CI pipeline being executed which will deploy each function as a Knative service.
Once the deploy stage has finished, additional details for the function will
appear under Operations > Serverless.
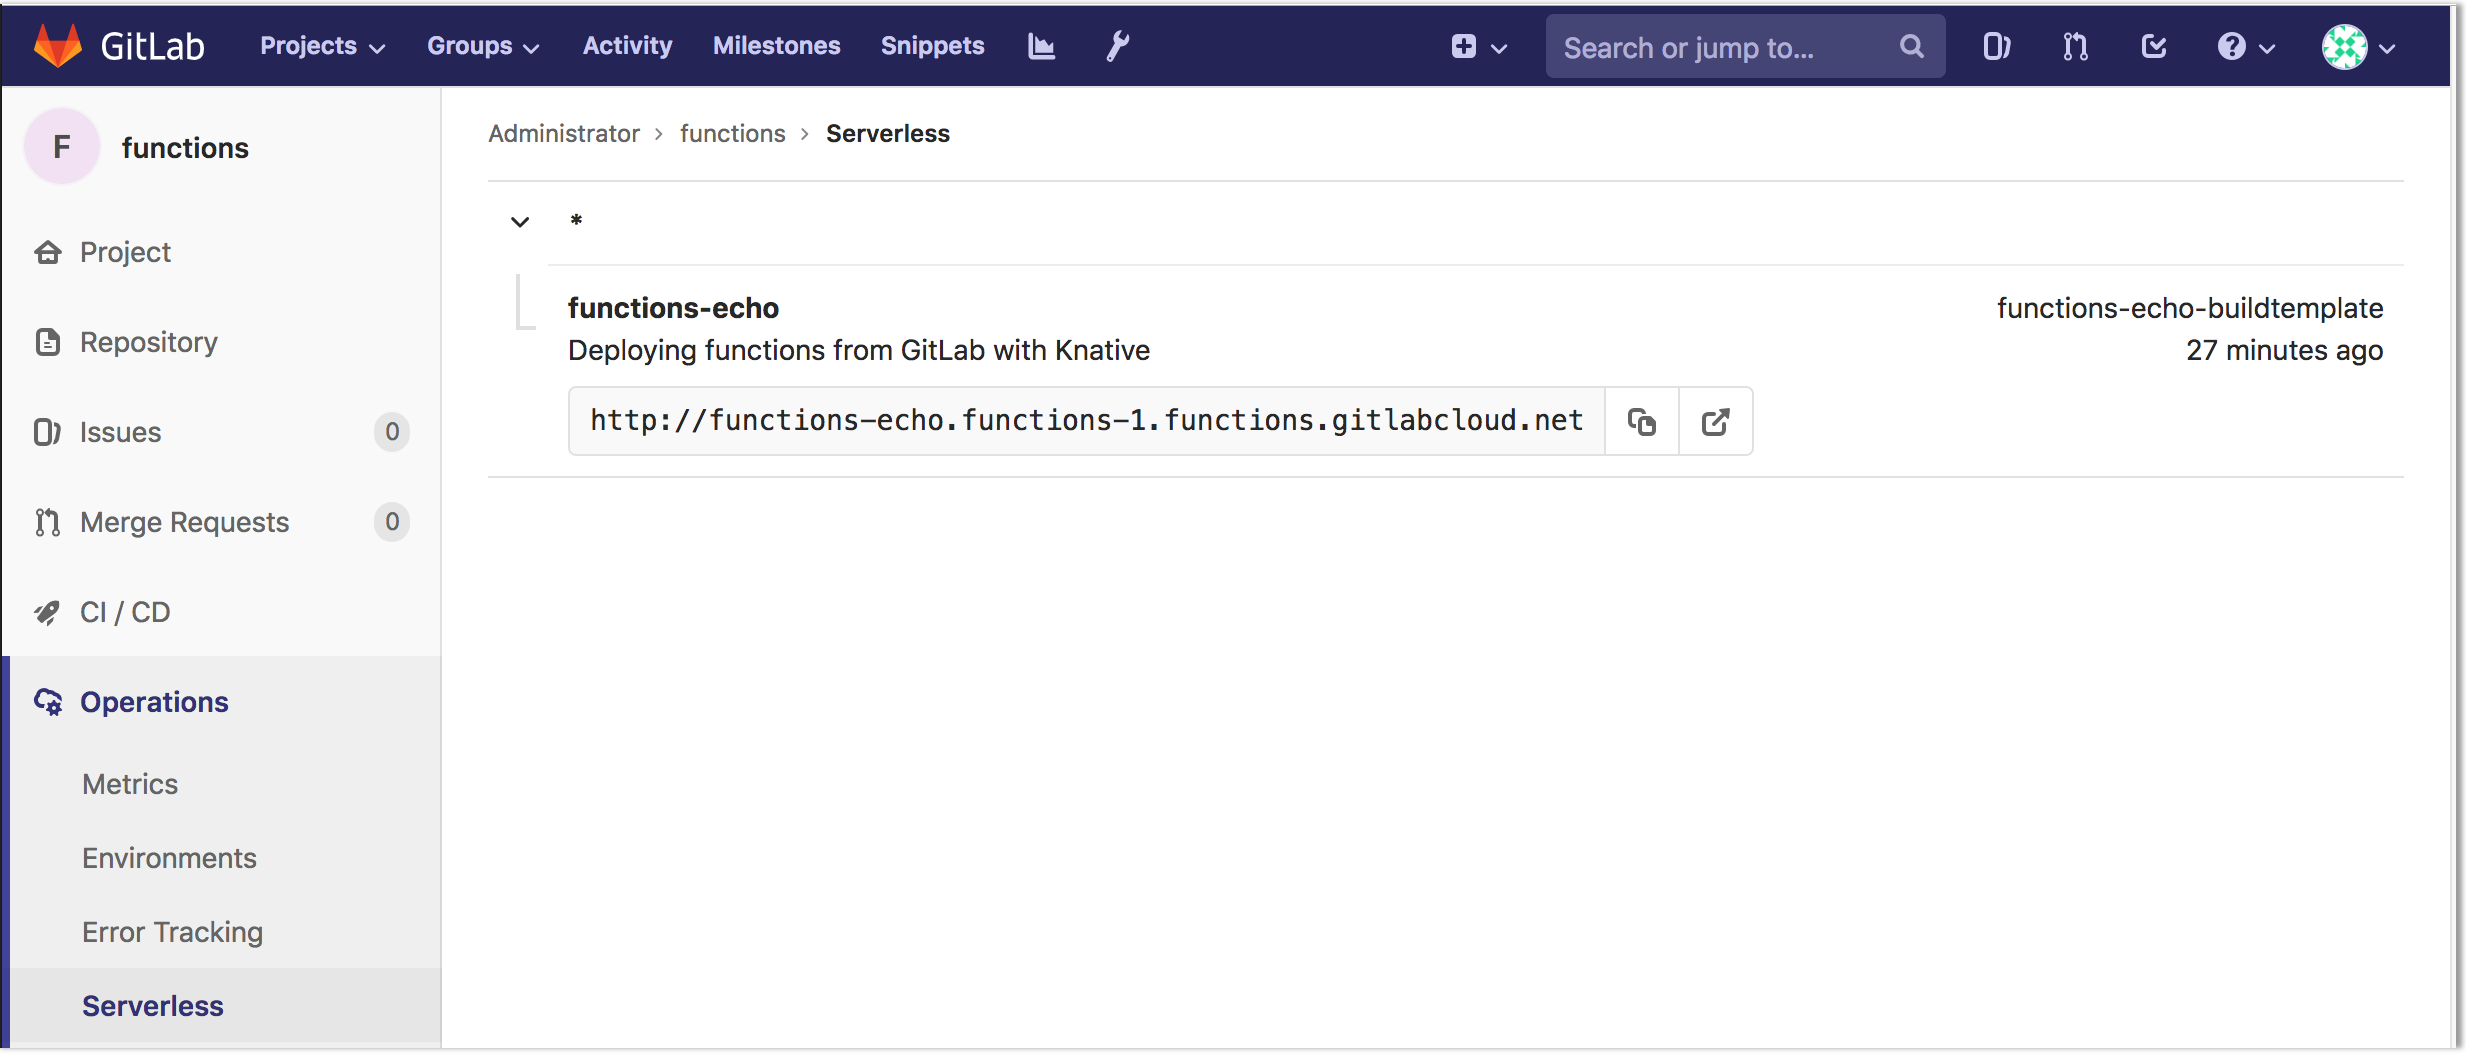
This page contains all functions available for the project, the description for accessing the function, and, if available, the function's runtime information. The details are derived from the Knative installation inside each of the project's Kubernetes cluster. Click on each function to obtain detailed scale and invocation data.
The function details can be retrieved directly from Knative on the cluster:
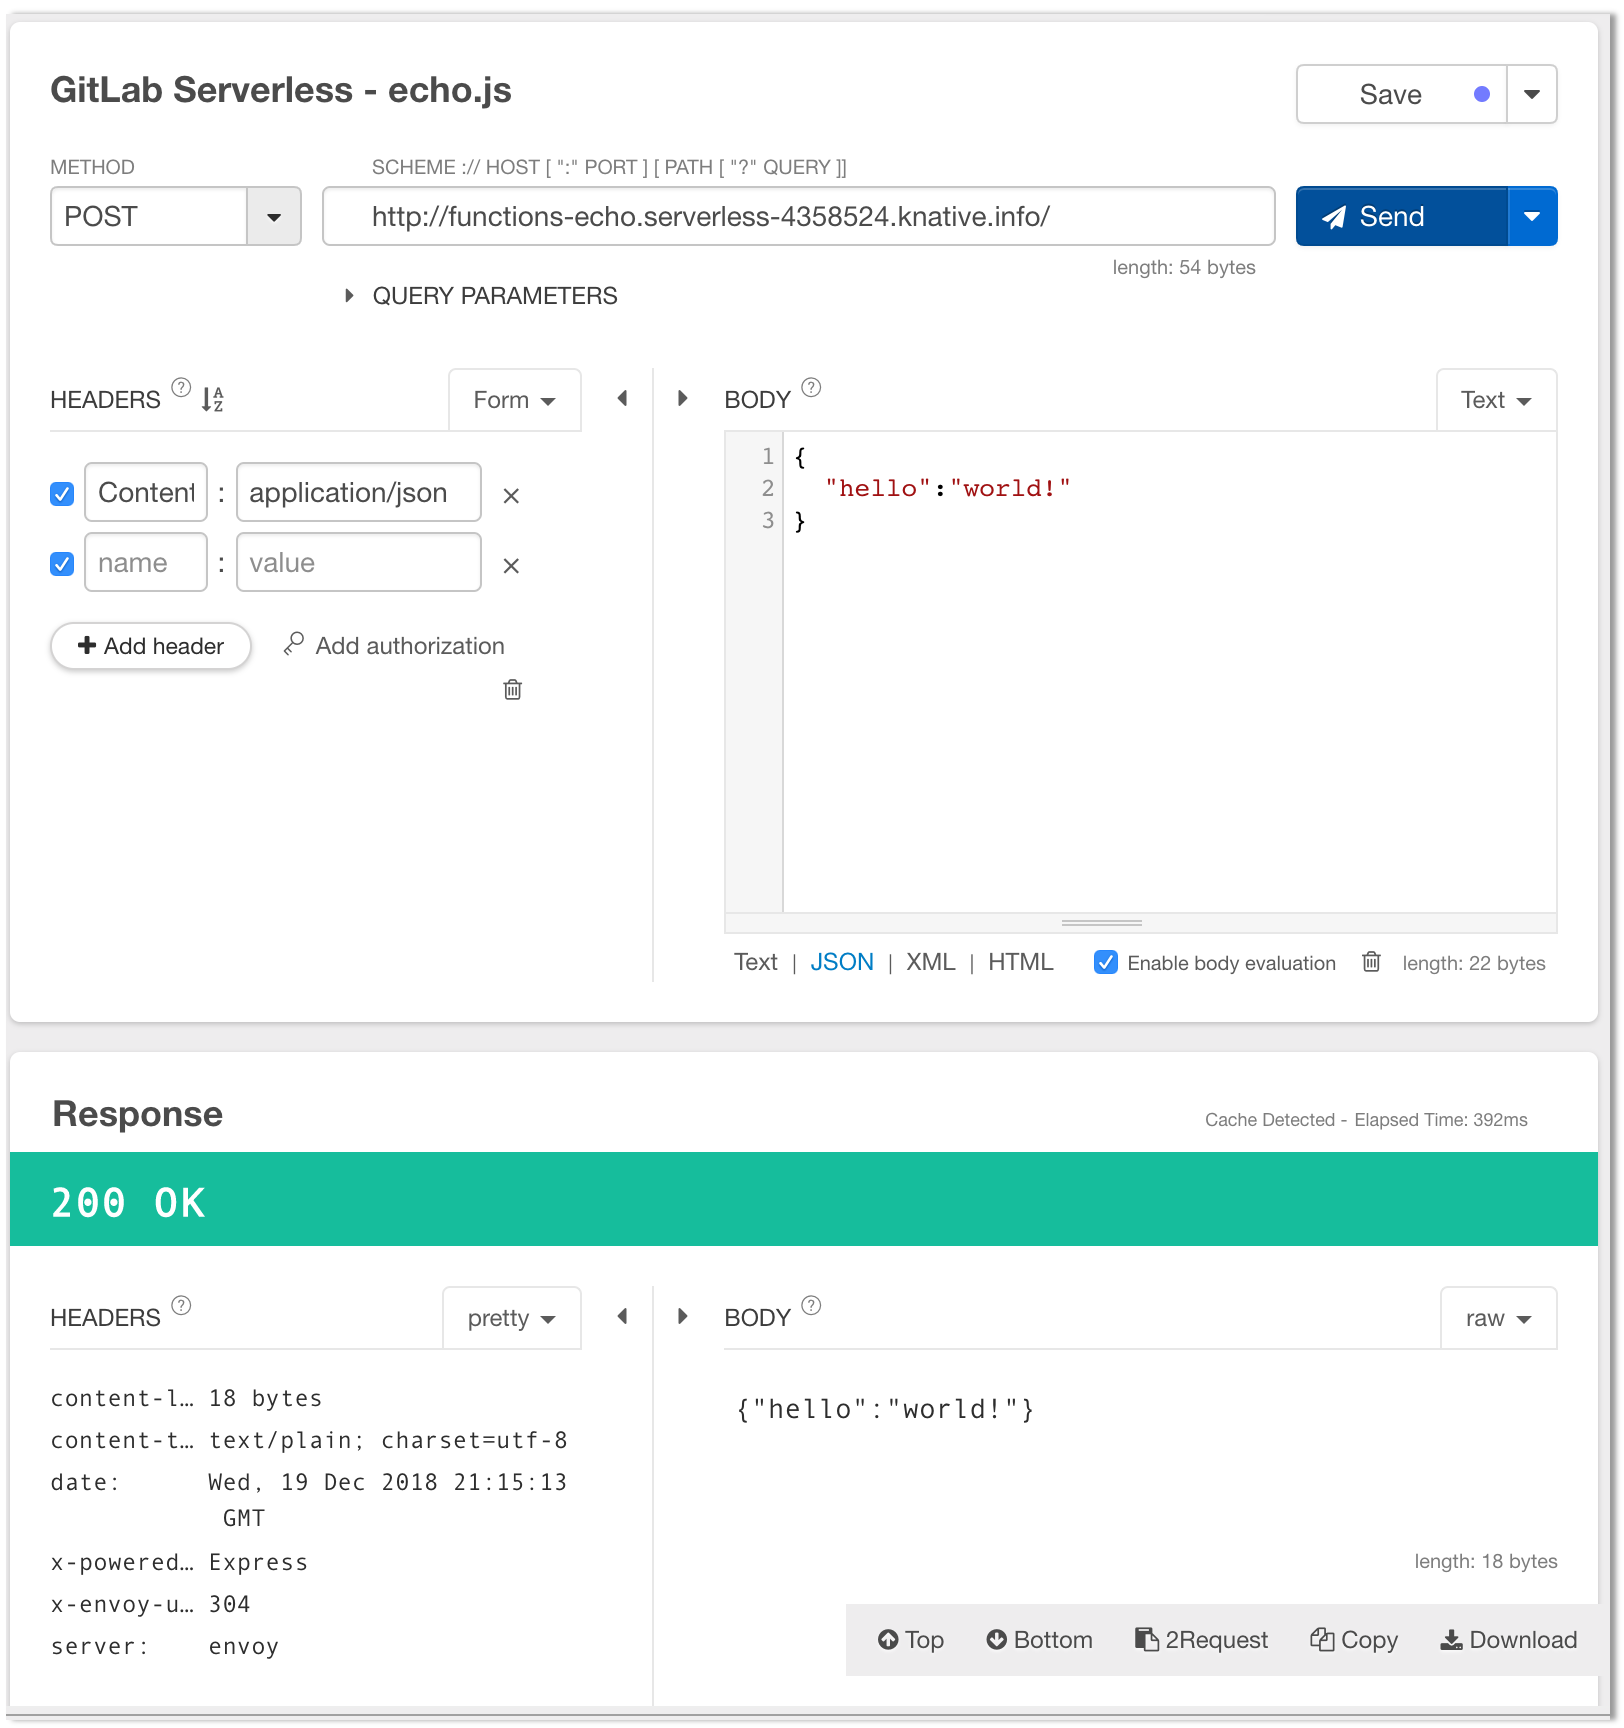
kubectl -n "$KUBE_NAMESPACE" get services.serving.knative.devThe sample function can now be triggered from any HTTP client using a simple POST call:
-
Using curl (replace the URL on the last line with the URL of your application):
curl \ --header "Content-Type: application/json" \ --request POST \ --data '{"GitLab":"FaaS"}' \ <http://functions-echo.functions-1.functions.example.com/> -
Using a web-based tool (ie. postman, restlet, etc)
Deploying Serverless applications
Introduced in GitLab 11.5.
NOTE: Note: You can reference and import the sample Knative Ruby App to get started.
Add the following .gitlab-ci.yml to the root of your repository
(you may skip this step if you've previously cloned the sample Knative Ruby App mentioned above):
include:
  template: Serverless.gitlab-ci.yml

build:
  extends: .serverless:build:image

deploy:
  extends: .serverless:deploy:image
Serverless.gitlab-ci.yml is a template that allows customization.
You can either import it with include parameter and use extends to
customize your jobs, or you can inline the entire template by choosing it
from Apply a template dropdown when editing the .gitlab-ci.yml file through
the user interface.
Deploy the application with Knative
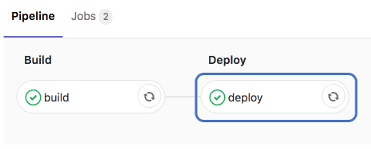
With all the pieces in place, the next time a CI pipeline runs, the Knative application will be deployed. Navigate to CI/CD > Pipelines and click the most recent pipeline.
Obtain the URL for the Knative deployment
Go to the CI/CD > Pipelines and click on the pipeline that deployed your app. Once all the stages of the pipeline finish, click the deploy stage.
The output will look like this:
Running with gitlab-runner 11.5.0~beta.844.g96d88322 (96d88322)
  on docker-auto-scale 72989761
Using Docker executor with image gcr.io/triggermesh/tm@sha256:e3ee74db94d215bd297738d93577481f3e4db38013326c90d57f873df7ab41d5 ...
Pulling docker image gcr.io/triggermesh/tm@sha256:e3ee74db94d215bd297738d93577481f3e4db38013326c90d57f873df7ab41d5 ...
Using docker image sha256:6b3f6590a9b30bd7aafb9573f047d930c70066e43955b4beb18a1eee175f6de1 for gcr.io/triggermesh/tm@sha256:e3ee74db94d215bd297738d93577481f3e4db38013326c90d57f873df7ab41d5 ...
Running on runner-72989761-project-4342902-concurrent-0 via runner-72989761-stg-srm-1541795796-27929c96...
Cloning repository...
Cloning into '/builds/danielgruesso/knative'...
Checking out 8671ad20 as master...
Skipping Git submodules setup
$ echo "$CI_REGISTRY_IMAGE"
registry.staging.gitlab.com/danielgruesso/knative
$ tm -n "$KUBE_NAMESPACE" --config "$KUBECONFIG" deploy service "$CI_PROJECT_NAME" --from-image "$CI_REGISTRY_IMAGE" --wait
Deployment started. Run "tm -n knative-4342902 describe service knative" to see the details
Waiting for ready state.......
Service domain: knative.knative-4342902.example.com
Job succeeded
The second to last line, labeled Service domain contains the URL for the deployment. Copy and paste the domain into your browser to see the app live.
